This guide uses cURL and the Chat Completions endpoint. You can use the same API key and base URL with the OpenAI JavaScript or Python SDK afterward.
Create an API key
Sign in to the Synux Dashboard, open API Keys, and create a key. Choose Reveal, then copy the secret to a password manager or secret store.
Choose a model
Open the model catalog. Select a model that supports chat, then copy its exact model ID.
Set your API key
Store the key in an environment variable for your current shell.
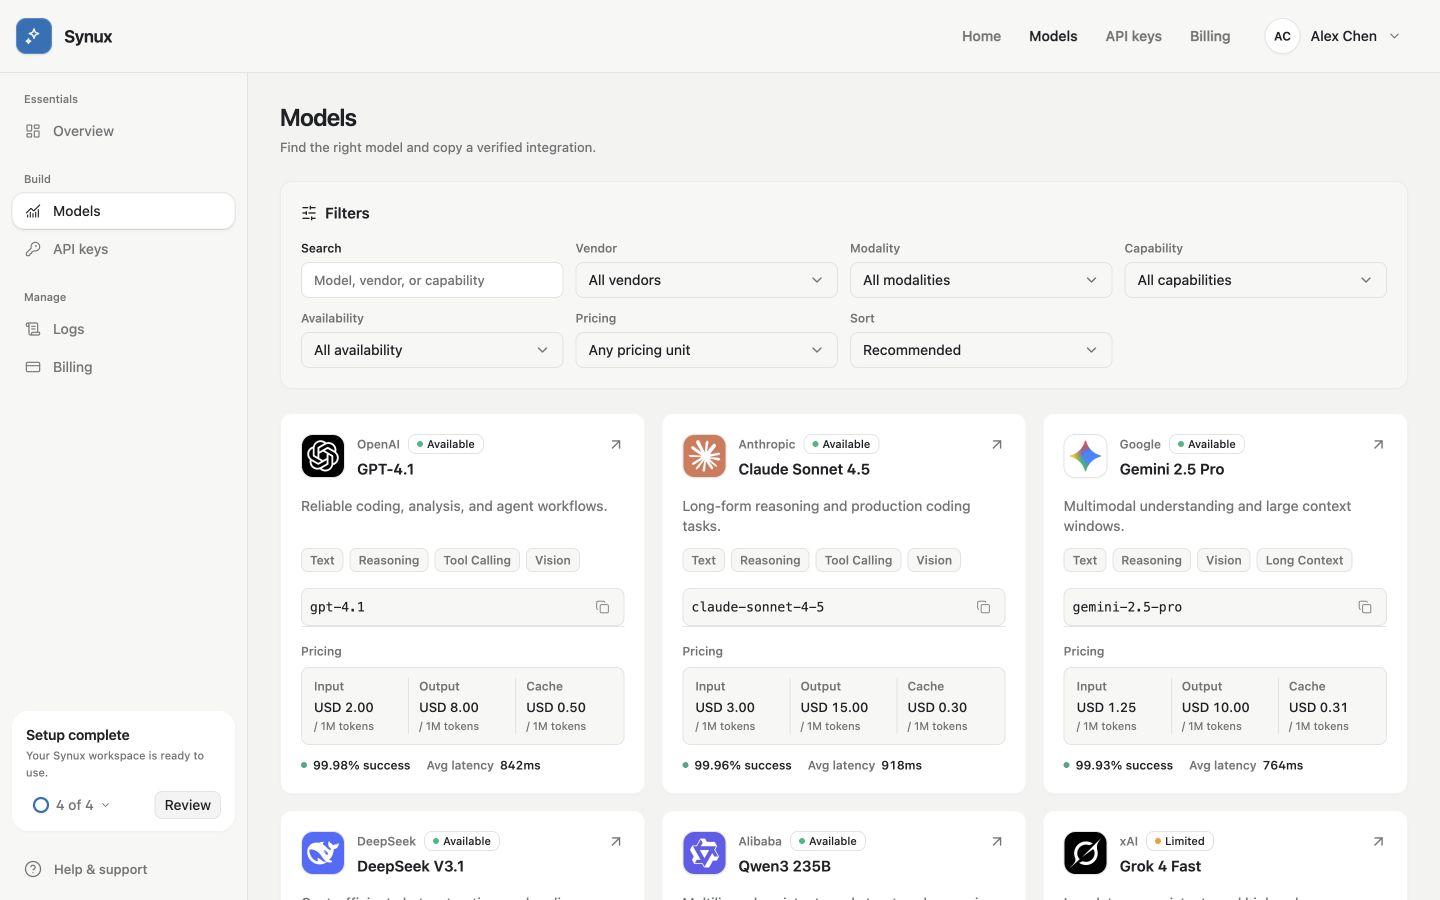
Compare available models, then copy the exact model ID from its card. Availability and pricing shown here are sample data.
export SYNUX_API_KEY="your-api-key"$env:SYNUX_API_KEY="your-api-key"Send a request
Replace your-model-id with the ID you copied from the model catalog.
curl "https://api.synux.ai/v1/chat/completions" \
  --header "Authorization: Bearer ${SYNUX_API_KEY}" \
  --header "Content-Type: application/json" \
  --data '{
    "model": "your-model-id",
    "messages": [
      { "role": "user", "content": "Say hello in one short sentence." }
    ]
  }'
A successful response includes the assistant message in choices[0].message:
{
  "id": "chatcmpl_...",
  "choices": [
    {
      "index": 0,
      "message": {
        "role": "assistant",
        "content": "Hello!"
      },
      "finish_reason": "stop"
    }
  ],
  "usage": {
    "prompt_tokens": 16,
    "completion_tokens": 2,
    "total_tokens": 18
  }
}
Response fields can vary by model. Treat additional fields as optional unless your selected model documents them.
Verify available models
You can also list the models visible to your key:
curl "https://api.synux.ai/v1/models" \
  --header "Authorization: Bearer ${SYNUX_API_KEY}"
Continue building
- Connect the OpenAI JavaScript or Python SDK.
- Return partial output sooner with streaming.
- Review the supported API endpoints.